My
First GUI
Much
of the user friendly software we see today has a graphical user interface
(GUI, pronounced gooey). This is the windows
desktop that we have become familiar with.
If we supply a GUI, users can click on buttons and enter text into boxes
for input. The steps below will help you
to write your first GUI.
As
our first example, we will write a GUI for the very simple add5 function, which just adds 5 to whatever number you give
it.
1. Start Visual C++ 2005
(or 2008).
2. Open a new project
choosing CLR (Microsoft’s Common Language Runtime protocols) as the Project
type. Choose Windows Forms Application
under Templates.
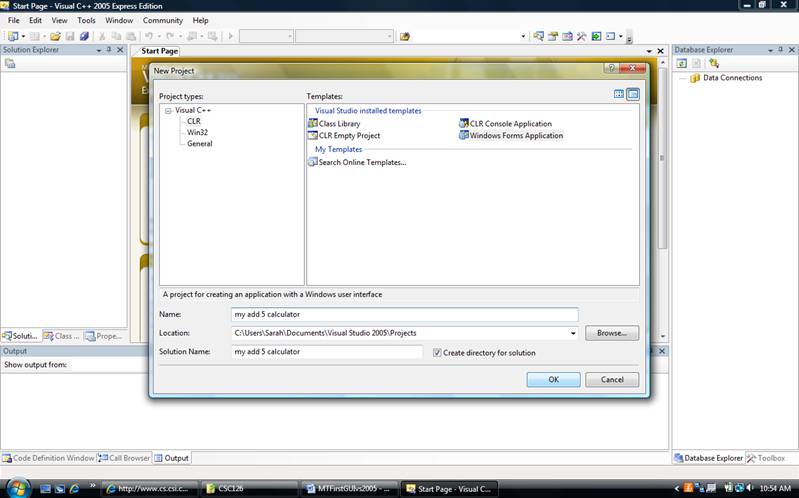
Fill
in project name. In the picture above we
called the project my add 5 calculator. Click on the OK button.
3.
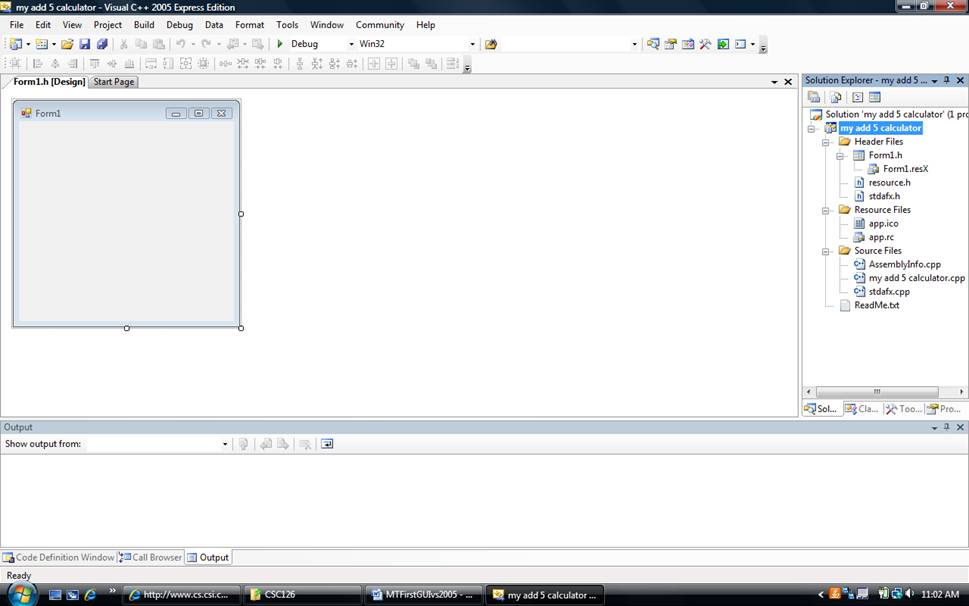
We
would like to have the following windows: Solution Explorer, Properties, and
Toolbox. If any of these are not open by
default, you can go to the View menu and choose those windows. The Properties window might be under
View/Other Windows.

4. Drag all three window to be docked at the right
hand side of the screen (this can be done by dragging the window over the
docking icon that comes up on the right hand side of the screen). If you drag one window’s title bar on top of
the other, they will create a tabbed window as shown below.
4.
Let’s
see what we want to add to our GUI.
Let’s assume the original add5
function looked something like this:
void add5 (int num)
{
int
sum;
sum
= num + 5;
cout
<< "Five added to " << num << " is "
<< sum << endl;
}
We want to add two textBoxes.
One will be used to input num.
The other will be used to output
sum.
Drag and drop two textBoxes from the
Toolbox onto your GUI panel as shown.

5.
Now
we want to add 1 button to our GUI panel.
We will click on this button when we want to tell the program to start
the calculation. Drag a button from the Toolbox onto your form.

6.
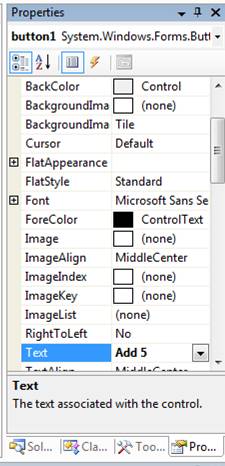
By
using the Properties window, you can change the words that are displayed in the
Button. With the button selected, the
Properties of the button will show up in the properties window. Type something meaningful into the text
property to be displayed. See the Properties window below.
7.
You
can drag labels to the form to create a more meaningful interface. A label has a text property can be changed
just as the text property of the button was changed. These text can be viewed as a type of prompt.

8.
Below
you can see the interface with the text of the labels changed and with the
objects on the form aligned nicely. You
can align controls on a form by clicking and dragging them.

9.
Double click on the Add 5 button to go to the source code that will be executed when
the button is clicked.
A member function will show up. Add the statements
that are within the curly braces so that the function looks like this:
private: System::Void button1_Click(System::Object^ sender, System::EventArgs^ e) {
int num, sum; //declare
variables
Int32::TryParse(textBox1->Text,num); //take text input
from textBox1 and place in num
sum = num + 5;
textBox2->Text = sum.ToString (); //take number from sum and convert to text to output to
textBox2
}
10.
Compile and Run your program in the usual
manner.